Probably last post of 2006


There will be a new format for my posts from now on. (hopefully, more on this later).
Thanks to Ed Holloway for creating the Ink bloy tool for Windows Live writer. Hopefully my handwriting can be read.
I will be adding more as the week progresses.
Merry Christmas
Kortney
Well, Advanced Photography is done. I'm awaiting my grade in the class, but I am not to worried about it.
We had our final on Monday night and turned in our 'Portfolio'. Our Portfolio consisted of 10 pictures (divided between 2 categories or genre's of photography). I choose Architecture and Commercial photography as my two categories. I used previously taken pictures for my Architecture shots and took new pictures for the commercial shots. You can checkout my photos for this at Flickr.
I am currently unsure if I am going to take a course this next semester. There are some interesting things that are happening in my life right now that will determine my schedule for the spring. I will update this more as it develops.
Also my plan for this next year is to attempt to do a "Photograph a Day" to document my journey through photography.
So Monday night, we started discussing digital photography. We got into how sensors work and what noise is and all that 'fun' stuff. To me it is interesting to know some of the technology behind a camera, but there are some days I don't care how it works as long as it does. I will admit, before digital cameras came out, I wasn't into photography all that much. But eversince I got my first digital camera, I have absolutely fallen in love with photography. It is a fun way to express myself and capture memories.
So on this journey through photography knowing the difference between a CCD and CMOS sensor is interesting, but not necessary to take a picture. The process of taking a good picture that causes someone to say "Wow" is not reliant on the camera. It is a result of how the photographer sets up the scene, whether in a studio or out in the world. To many people get caught up on the type of camera, the lens, the number of megapixels, etc. These might aide in the capture of the scene or moment, but it is the photographer who takes the photo because he/she is moved by what they see. So I encourage everyone not to worry about what type of equipment you are using (film or digital, point n shoot or SLR), just get out there and shoot. Have fun, enjoy this process of taking a picture.
I am going to go through the Lighting 101 over on Strobist.com over this break. Through my Advanced photography class I am starting to get a better handle on light. I think I am ready to dive into this whole off camera strobe idea. I just need to get a few cables and I should be good to go.
For those of you who haven't checked out Strobist.com yet, you really need to.
Have a happy Thanksgiving.
Here are the photos that I promised from the two studio setups that we had.
Standard Portrait Setup Photo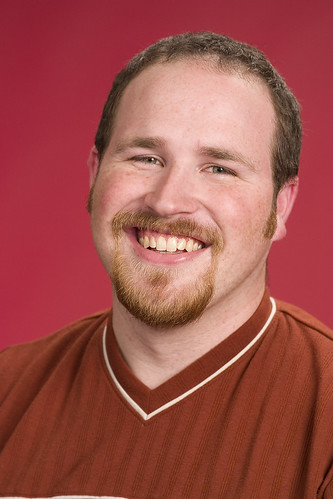
This setup has the main on the right side of the scene (from the photographers perspective).
High Key Setup Photo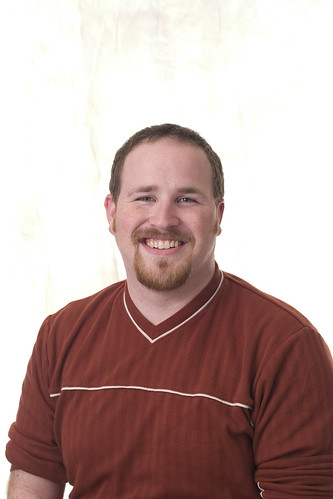
This setup had the main light on the left from the photographers perspective.
Last night we discussed the zone system developed by Ansel Adams.
My understanding of the zone system is this:
The zone system deals with the tonality of the subject matter based upon the amount of reflected light. So whenever we use our TTL (through the lens) meter we are in essence using the zone system of tonality. Where this really comes into play is the fact that your TTL meter wants to make every 18% gray so no matter what you focus on, your camera will try to make it 18% gray. This is where we get into trouble and where the zone system can help us out. There are 10 zones in the zone system. O - IX designated by Roman numerals. Some key zones to remember are:
IX - Pure White, there will be no texture here
VII - White with some texture, imagine snow in the shade, it will still be white but you can make out the texture of the snow
VI - This is the zone where caucasion skin tones are
V - This is 18% gray
O - Pure Black, there will be no texture here.
One thing to note here is that every zone is exactly 1 stop apart from the previous zone. So this means that Zone VI is one stop or twice as much light as Zone V. So this will help us when taking a picture of a person. If we want there skin to be the right tone and the TTL meter gives us a reading of F8 at 125 we know that we need to open up one stop more to get the correct exposure. So we could do F5.6 at 125 or F8 at 60.
The resources that we were giving to help us understand the zone system better are:
http://www.zone2tone.co.uk
http://luminous-landscape.com/tutorials/zone_system.shtml
http://www.creativephotography.org/education/guides/aaguide/zonesys.htm
http://en.wikipedia.org/wiki/Zone_system
http://www.srphotography.co.uk/srpzone.html
http://www.normankoren.com/digital_tonality.html
Last night we went over our test and our umbrella project. I did well on the test and I think I did well on the umbrella project.
We also started going into the setup of studio lights. We went through 2 styles of setup: standard portrait and a high key setup.
Standard Portrait Setup
The aperture settings here are just good starting points. You can adjust them as you need to achieve the desired affect.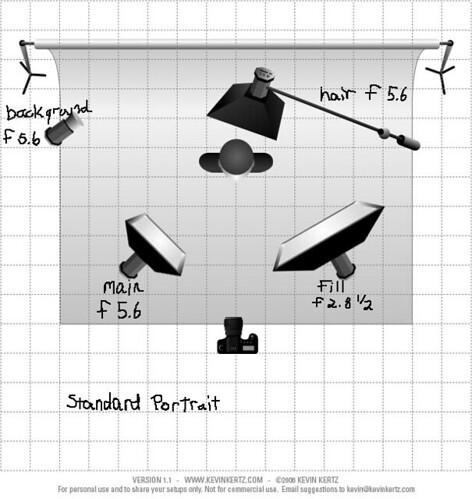
High Key Setup
The purpose of a high key setup is to achieve an ethereal look. You normally want your subject in white. This setup will give you a pure white background with good detail on the subject. An example of use for this is mother and baby pictures. 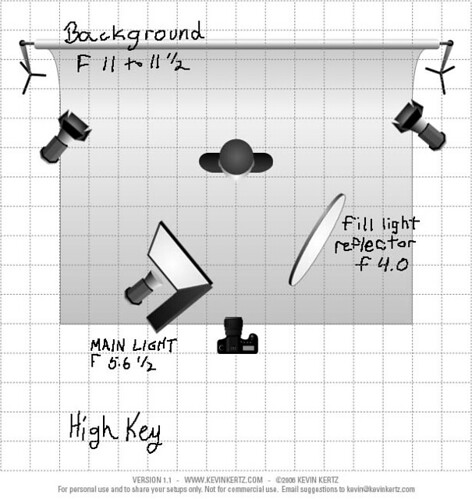
I will post some sample shots from both of these setups in the next couple of days.
Photo 7:
This shot was a random one noticed by my wife. We sprayed the umbrellas with a mist of water to achieve the rained upon effect, when she noticed the neat look it had with the water and the shadows.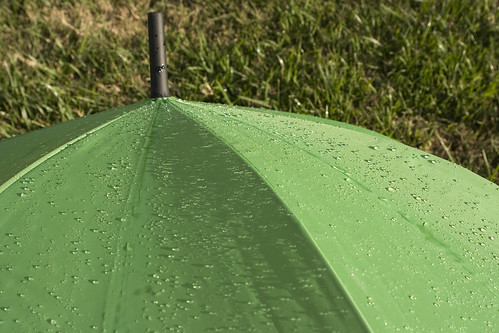
Photo 8:
I wanted to capture the water streaming down this one, so my wife was spraying it with the water hose as I was snapping shots. I had to use a neutral density filter on this shot to get a long enough shutter speed to achieve any motion in the water.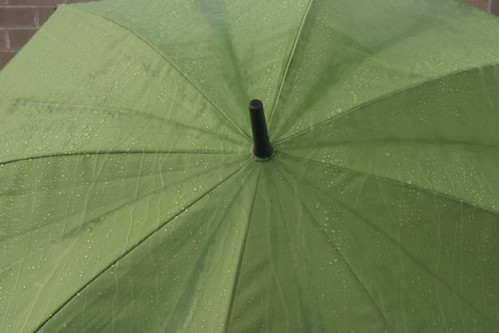
Photo 9:
Once again my dog, Bridgett, agreed to be my model. It took a while to get her to sit still with the umbrella, but I think this photo captured her attitude very well.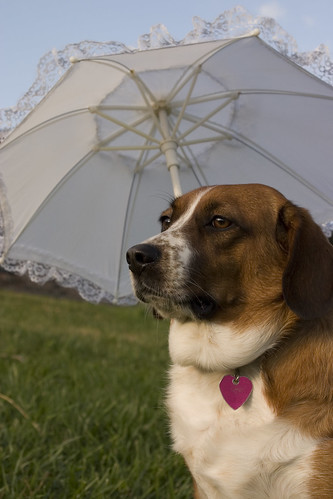
Photo 5:
Once again my lovely wife agreed to be a model in my project. This time my dog decided to join her. I like this shot because both of them are gazing out of the scene.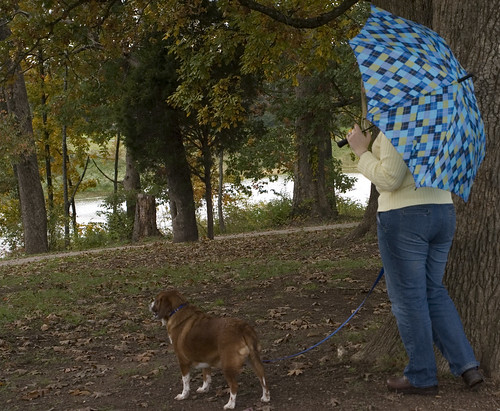
Photo 6:
This was an interesting shot to capture. My wife threw the umbrella into the air quite a few times befor I got a shot that I thought I liked. The problem was when I was going to review them my battery died and I did not have a spare on me. But I loved this shot when we got home.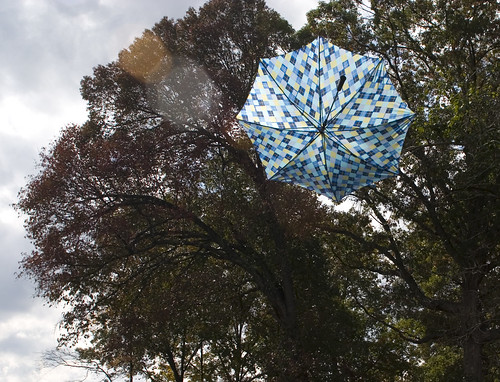
Photo 3:
My wife standing on a pier. This is one of my favorites from this project because of the reflection and the emotion it conveys to me.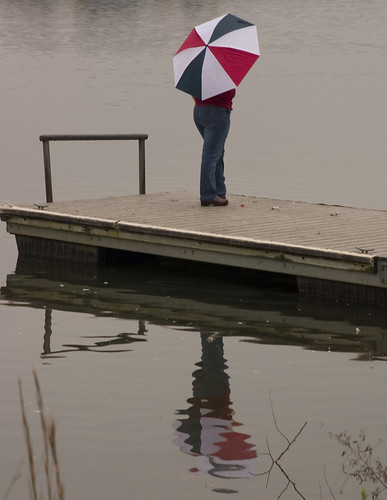
Photo 4:
This is my good friend Maryah on her wedding day. Since I was taking her photos for her she graciously agreed to model for my project. This was taken at about noon, I use a reflector to add some more light back into her face. 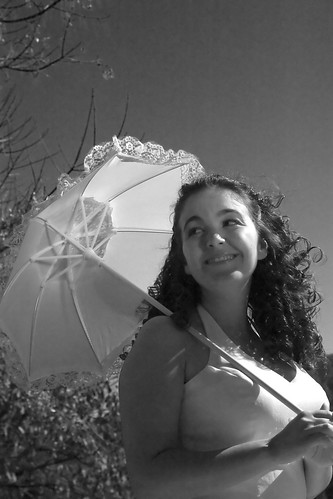
The project that we had for this week was to take creative pictures of umbrellas. I did the best that I could, but sometimes the imagination just wouldn't work. Or I knew what I wanted the photo to look like in my head and could never get it to translate to the real world correctly.
Here are my attempts at this project.
Photo 1:
An umbrella backlit by a CFL bulb in my living room.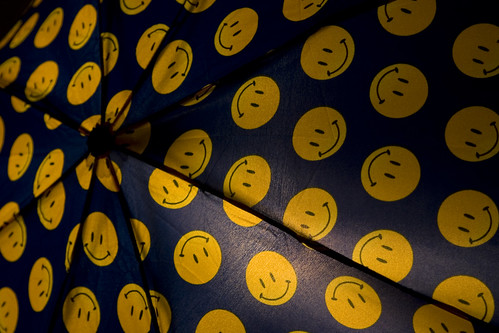
Photo 2:
Another umbrella backlit by a CFL bulb in my living room. This time with a twist (literally), my wife is spinning it while I take the photo.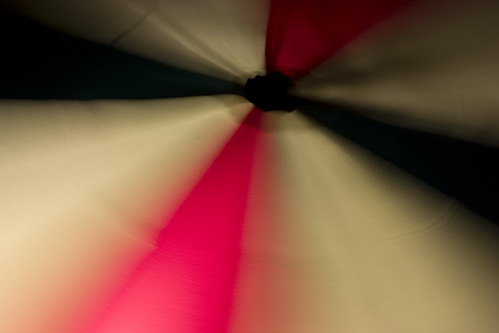
On Monday, we discussed the photos that we have taken over the course of this class. It was really neat to see my fellow students work. We have some very talented photographers in our class.
Our next assignment is to photograph umbrellas. We can do whatever we want - be creative is what we were told. So I will see what I can come up with. I have a couple of ideas right now and will start posting the photos as I take them and process them. We are allowed to do photoshopping if we want. I prefer to try to capture everything in camera and do as little as possible after the fact. We will see how good I am to create the scene in real life as I have it pictured in my head.
This weekend I should have some opportunities to take some pictures, as I am going to Nashville for a friend's bachelor party. Next Saturday I will be one of the photographers doing a wedding. My job is to get candid photos and the ceremony. Another photographer is taking pictures of people for the guest book. And another is doing all the formal (posed) pictures. This should be an interesting experience as it is outside and at 2 in the afternoon. If anyone has any suggestions, I would appreciate the advice.
Last night, instead of having our regular class we had a guest speaker. Mark Mosrie is a commercial photography out of Nashville. He had a lot of really good photos and gave us a lot of useful information to get started in the photography field.
Ken also gave us some magazines to check out:
We had a pretty interesting class last night. We started learning about the studio lights. Before I get into the lights here are the notes on light.
There are two types of light:
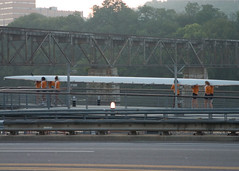
10 - Scale
Originally uploaded by Kortney Jarman.
This photo was my attempt to use the idea of scale. Here we see the large row boat and the size of the people carrying the boat.
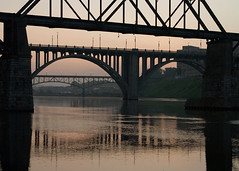
9 - Layering
Originally uploaded by Kortney Jarman.
This photo was my attempt to use the layering technique. My goal was to capture the 3 bridges and have them framed inside one another.
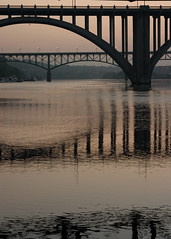
8 - Horizon Lines, Rule of Thirds
Originally uploaded by Kortney Jarman.
This was an attempt to combine a couple of the rules of compostion. I like the reflection in the water here and am overall pleased with the way this turned out.
7 - Rythm and Repeating
Originally uploaded by Kortney Jarman.
This photo was another attempt at using a repeating pattern in it. I liked the way this one turned out, I just wish is was a little sharper.
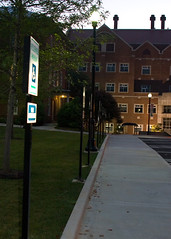
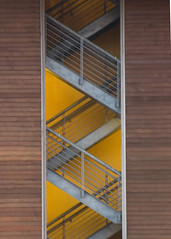
6 - Leading Lines
Originally uploaded by Kortney Jarman.
This was my attempt at leading lines. In the first photo I took here, the sign was to dark, so I attempted to lighten it up some with my flash (hot shoe, but still mounted on camera). I think I got a little too much light into the sign, but it still looks pretty good.
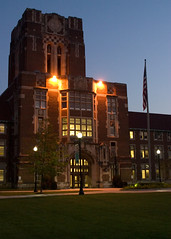
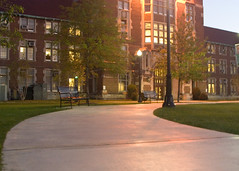
5 - Rule of Thirds
Originally uploaded by Kortney Jarman.
This was another attempt at the 'Rule of Thirds'. I like the way this photo turned out. I do wish that the sky was more exciting but, you can only work with what is available at the time. This was taken a couple minutes before the official sunrise time and the sky was starting to light up very nicely.
4 - S Curves
Originally uploaded by Kortney Jarman.
This photo was my attempt at a 'S Curve' photo. While it is not a true S curve, I thought it turned out pretty interesting.
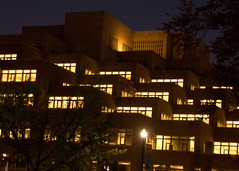
3 - Rythym and Repeating
Originally uploaded by Kortney Jarman.
This is a photo of Hodges Library on the University of Tennessee Campus. I used it as an example of the Rythm and Repeating compostional rule. I really like this shot, but I wish I had a wider angle lense so I could have gotten the entire building.
Our third class meeting has come and gone. It was an interesting class. We talked about pictures that we found in the different genre of photography that we liked. It was interesting to see everyone's photo choices and their likes and dislikes.
Next we watched a lighting video by Dean Collins. It was quite interesting, although a bit over my head right now. I am really excited about the whole lighting process, but I really want to start doing instead of just being lectured. This class has some great potential, but it will take awhile to get to the studio portion. More pictures to come.

2 - Rythym and Repeating
Originally uploaded by Kortney Jarman.
This is a photo trying to capture the 'Rythm and Repeating rule'.
It is a photo of my grass. (Please ignore the weeds in it) I thought the dew made this picture interesting.
1 - Rule of Thirds
Originally uploaded by Kortney Jarman.
Well, I was ablet to get out and take some photos over the past week and weekend. Some of the pictures that I took, I would classify as alright, others I would say were technically correct, but lacking emotion. Let me know what you think of these photos.
This one I took with the Rule of Thirds in mind.
All these 'rules' for composition can be found in Perfect Digital Photography, by Jay Kinghorn and Jay Dickman.
So what are these rules of classic composition that we hear about. The ones that are introduced in our book, Perfect Digital Photography are:
Rule of thirds - you dived your picture into sections (draw a tic-tac-toe board over it), at the one of the point of intersections for the lines you want the center of interest
S-Curves - these gentle sweeping curves draw your eyes through the photo
Rhythm and Repeating Patterns - the repetition will pull the viewer through the photo
Horizon lines - used to define areas in your photo, NEVER place across the dead center of your photo
Leading lines - something linear (fence row, parking meters) that pulls your eyes through the photo
Layering - distinctive layers in a photo that require the viewer to absorb the content of each layer and put it together for the photos message to be clear (think rock strata, but instead of up and down, it creates depth)
Scale - adding a familiar element (person, car, etc.) to a photo (think about a person next to a sequoia tree)
Tension - something that conveys emotion (this one is a hard one for me to describe)
Keep it simple - complexity will cause the viewer to get a headache; move close to the subject to fill the frame and don't place the subject in the middle of the frame
Breaking the rules - sometimes rules are meant to be broken
The final thing that this chapter leaves us with is a simple question:
"Does the photo work or not?"
The rules given here are a great guideline or aide to get us started with the composition process. This process starts before you put the camera to your eye. As photographers we must imagine what the photo will look like before we ever take the photo.
I will be out shooting this weekend, so hopefully I can share with everyone examples of these rules.
The second day of class wasn't to bad. The teacher was sick, so we joined with one of the other classes, which was photojournalism. It was a very interesting lecture. (Warning: I've tried to organize my notes the best that I can, the instructor had a tendancy to ramble and switch thoughts mid-stream)
We talked about lighting situations. From low light, room lights, and flashes.
Low Light Situations
In some low light situations, you can't use a flash. In these situations you want to 'push' your exposure. To push, with digital, you will bump your ISO up to the smallest the situation will allow. Normally at night you will need an ISO of 1600 or 3200. (Note: no matter what ISO you are at, you will still capture the same number of pixels) The issue that arises when you increase your ISO is noise. This is where the pixels don't know what they are supposed to do. Here is where the cost and age of your camera come into play. The older your camera is, the higher amount of noise it will have. Also the more expensive your camera is, the better the chip that records the information. There is a big difference between digital SLRs and the compact point and shoot in relation to noise. The compact point and shoot will have a lot more noise at the higher ISOs.
Two rules for low light situations:
1. Own a good camera
2. Shoot with arms tucked at sides for more stability
Inside with room lights
Not a lot was said about these situations. If you are taking photos indoors and there is not enough light, take the shades off the lamps. This will increase that amount of available light and help with shadows.
Flashes
The instructors first comment about flashes was: The on camera flash is crap, rip it off. So with that note, I do recommend getting an external flash. Check out Strobist for more information about off camera flash photography.
Once you have the flash, his recommendation was to use it off the camera when ever possible. If you have to use it on your camera, don't have the flash pointing directly at the person. Angle the flash up so that you can 'bounce' the light to make it less harsh. He also recommended getting a good diffuser. Stofen makes an 'Omni-Bounce' that does this very well. The cheaper alternative is to find a medicine bottle that is white and about the size of your flash and make one for yourself.
An issue that you will run into using your flash is that the light from your flash has a different color temperature than daylight, floresent, and tungston. It is closer to daylight than the other two. If you are shooting with your flash inside, you will need to color correct for the difference. You can use gels to do this or Stofen makes 'Omni-Bounces' of those colors. (Floresent = Green, Tungston = Yellow)
You can use your flash as 2 different light sources:
1. Supplement - this is a fill flash. The existing light creates the scene and the fill helps with the shadows.
2. Compliment - the flash as the main light. The flash creates the scene and the existing light is the background.
Photojournalism
Photo journalists normally shoot extremes. This means they are normally shooting at a wide open aperture (f-stop 2 or 2.8) and a fast shutter speed (1/1000). The wide open aperture forces the background out of focus while the fast shutter speed will catch the action. A couple of other things here: a photojournalist makes fast decisions about how he wants the picture to turn out (aperture and shutter speed), and he can decide how the person will look (wide angle lens - not flattering, telephoto lens - flattering).
Photojournalism is concerned with 3 areas:
1. Sports
2. Features
3. News
a. Scheduled
b. Spot
The last thing the he left us with was this:
Take pictures of interesting things.
In my class we were give a list of multiple photography styles and genres:
Architecture
Commercial / Advertising
- Food
- Catalog
Documentary
Fashion
Fine Art
Industrial
Landscape
Model
Music
Nature
Photojournalism
Portrait
Wedding
Sports
This is a large list of different niches in photography that you can specialize in. Personally, I have not figured out which one I like or fit into. There are great things to all of these.
One of our class assignments is to pick two categories and find some pictures out of magazines that we like and that 'hit' us. Then we have to explain what hit us about the photo and describe the compostition (lighting, arrangement, and what works or doesn't work).
I would love to read your thoughts on the different genres listed here or ones that aren't. What do you like and why?

Fair Picture 8 of 8
Well this is the last picture I put in the fair. This a close up of a sunflower that my wife got on her birthday. I was playing with light here. Hard light, soft light, whatever. I was having fun with 2 lamps with CFL's in them. It took me a little while to get the whitebalance corrected in my camera, but this shot turned out rather well.

Fair Picture 7 of 8
This is a friend of mine's son. This photo was taken at the playground outside our church. We were working with the kids during the summer and I had my camera with me (my wife says it is a permanent attachment.) I was lucky enough to capture this great expression on his face.
I decided to destaturate it and take it to an antique look because I felt his expression was the central focus of the photo and that the color would distract from it.

Fair Picture 6 of 8
The young girl on the right is my neice. She is now 2 years and as you can tell very photogenic (in my opinion). It is always fun to be around her and I need to remeber to always have my camera with me because you never know what she will do.
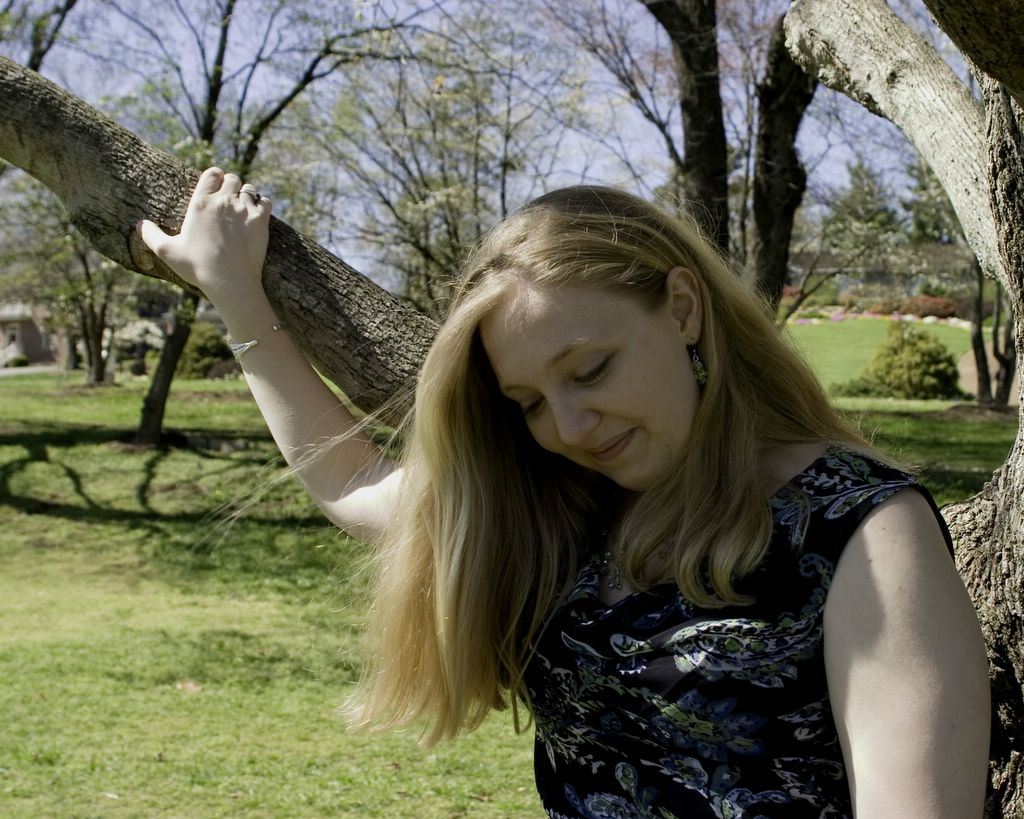
Fair Picture 5 of 8
This is my beautiful wife. She reluctantly agreed to be a model for me while I was playing with different lighting techniques. This photo was matted on a sky blue mat.

Fair Photo 4 of 8
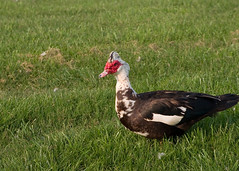
This is my dog, Bridget. She is my entry into the fair for the Domestic Animals section. She was being her mischievous self her and I was lucky enough to get a picture of her. Normally when I have my camera out she just wants to be directly in front of it, with her nose on the lens.
I was playing with DOF (Depth of Field) in this picture. As you can see, I was able to get Bridget in focus, while the grass in front of her and behind her are out of focus. To do this I used a very low aperture (f-stop).
Photos 5 - 8 to come soon.
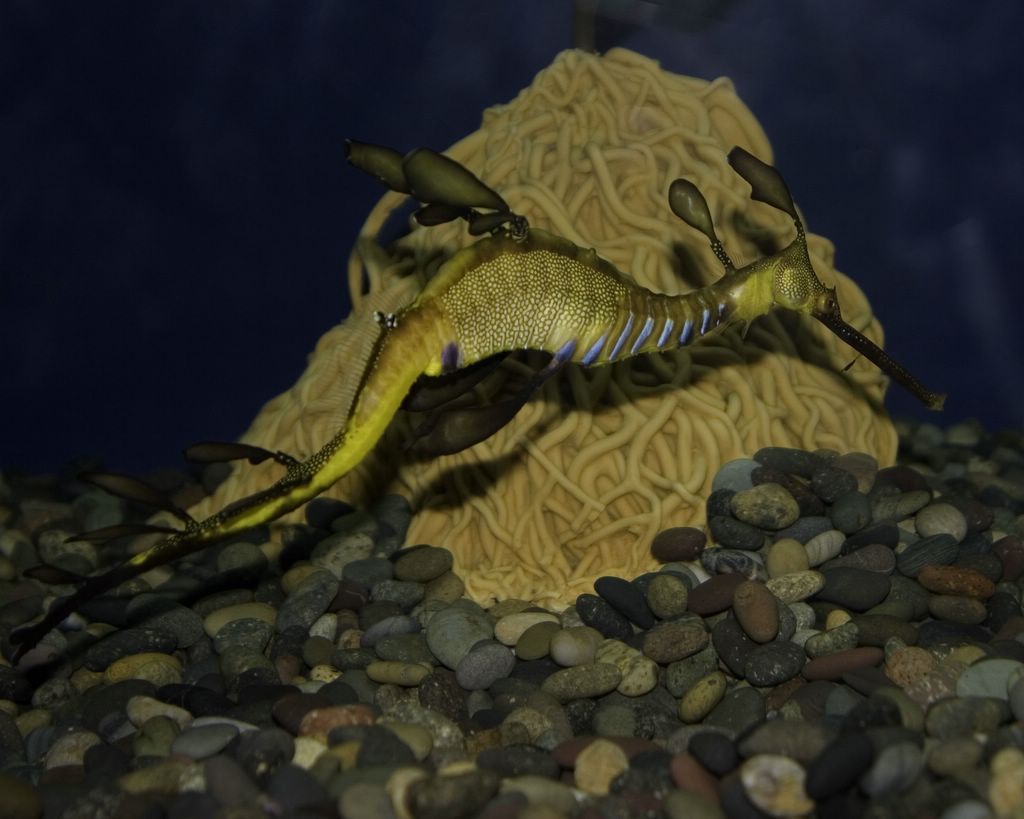
Fair Photo 3 of 8
This seahorse can be seen at the Tennessee Aquarium in Gatlinburg.
This was shot with my Canon Digital Rebel with the built-in flash (I have an off camera flash on the way Sigma EF 500 DG Super Flash). This photo has been matted on an orange mat similar to the color on the item behind the seahorse.
More to come later.
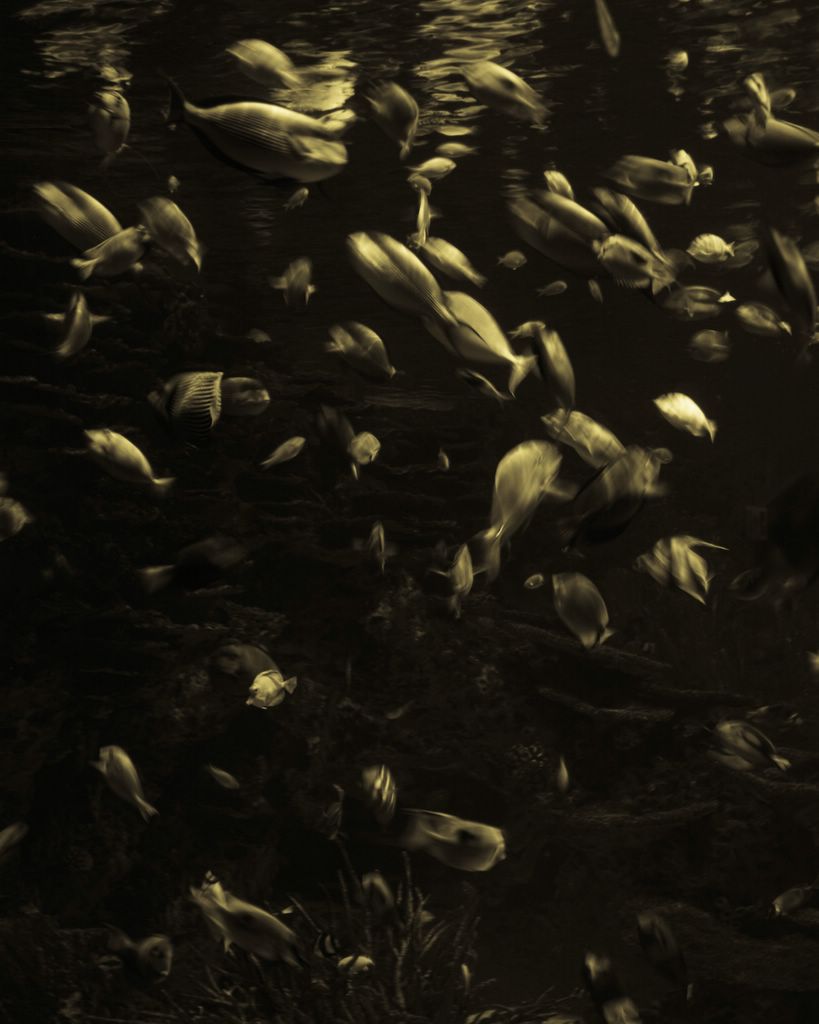
This is photo number 2 for the fair. This was taken at the Aquarium in Gatlinburg, TN.
It was originally a color picture, but to me it wasn't that exciting. I started playing with it ending up applying an "antique greyscale" filter to it. To me this photograph now jumps out at you. The print of it is even better.
More to come.
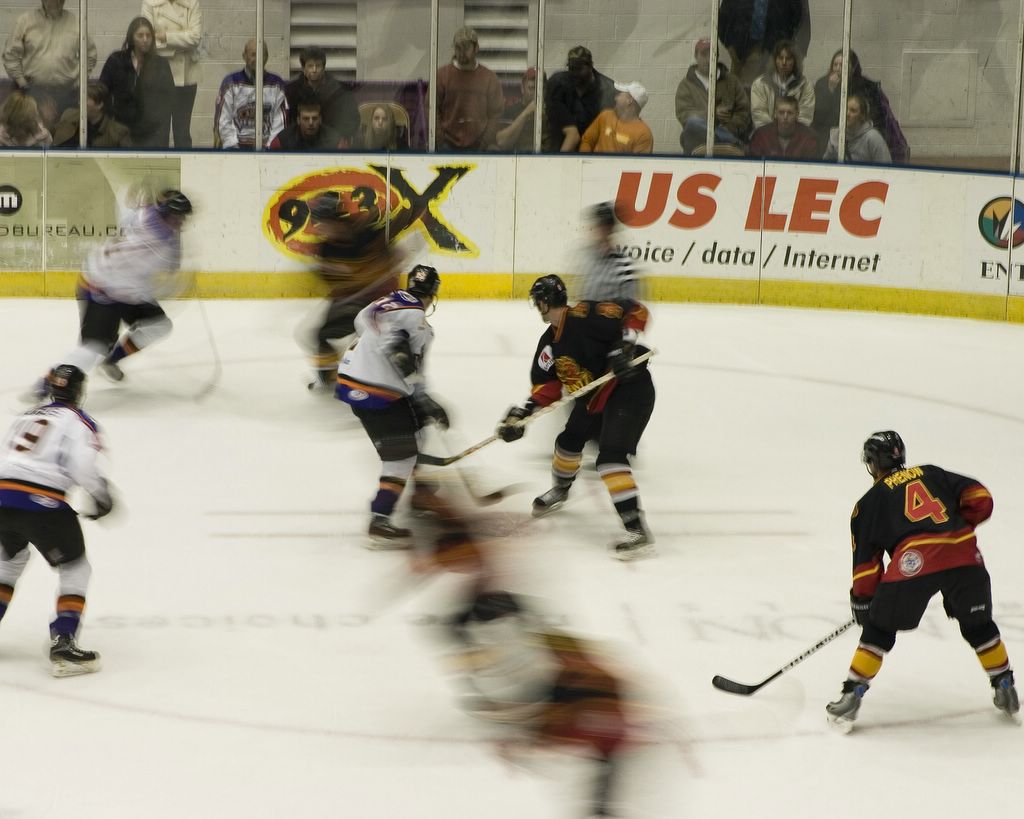
1 of the 8 pictures I am entering in the Tennessee Valley Fair Photo Contest. This one falls under the category of Motion - Action Shots. This photo was taken at an Ice Bears game while I was in my Introduction to Photography class. Getting an action shot that looks good is hard enough in good conditions. If you have ever been to a hockey game, you know that the lighting conditions are not exactly perfect. I took over 200 hundred pictures at this game playing around with apeture and shutter speed to get a picture that I considered good. Hope you enjoy it. I will continue to post more pictures for the fair as I get them edited and cropped.
Our first class was last night. The instructor seems to know his stuff and should make the class interesting and fun. I am looking forward to working with all the studio lights and other equipment that they have available for us. The class is Advanced Photographic Techniques. In the past they have focused on the chemical process the film goes through but the class will now focus on the process that digital chips go through to create the image. The book we will be using is "Perfect Digital Photography." We are required to have an off-camera flash for this class also, which means I need to spend more money. I also found out today that I can check-out light kits from the University of Tennessee Studio. I will need to get certified on the equipment so that I can start play with it. I will add more as I take pictures and attend classes.
This blog will be a log of my journey through photography classes. I will hopefully share my notes and pictures with everyone. I will also post any relevant information or websites that I think are interesting or informative.


